

Learn how to make a comic book in Photoshop using filters and comics brushes.
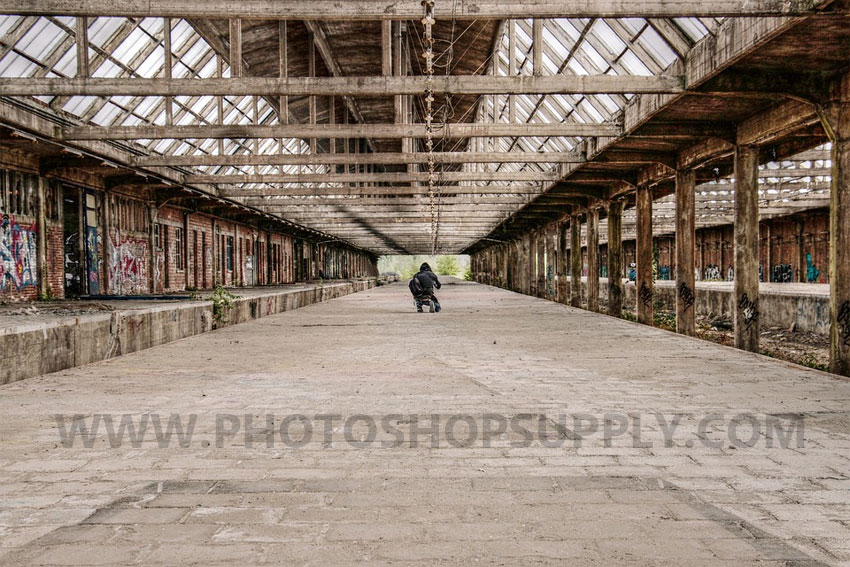
1. Add a Background Image
Create a new PSD file called Comics Book. Add this background image.

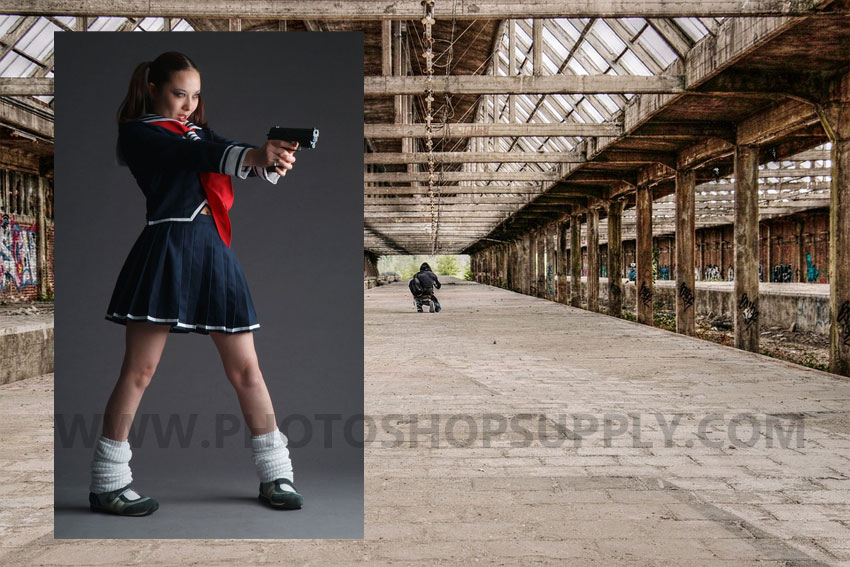
2. Add the Girl Image
In a new layer add the girl image.
3. Remove Background in Photoshop
Use the Quick Selection Tool to make a selection around the girl. Press Shift-Control-I to invert the selection. Press delete to remove the background.
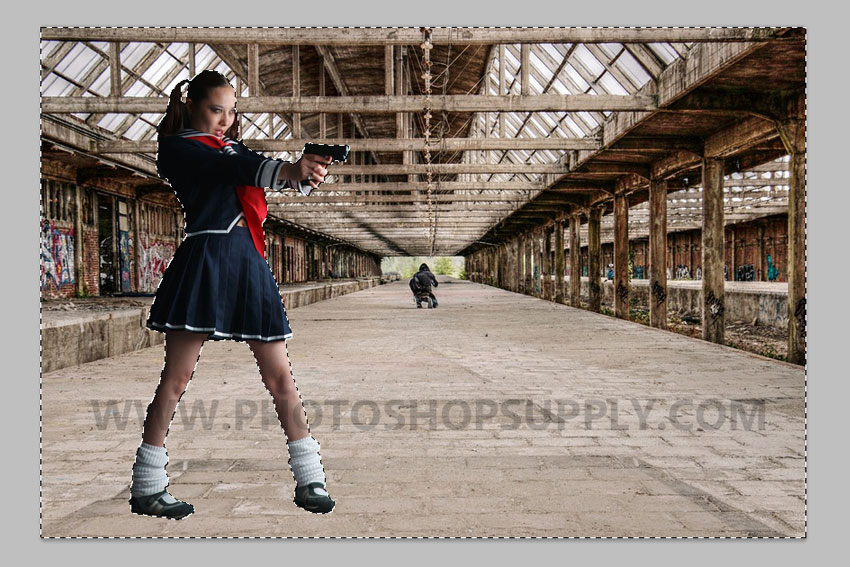
4. Deselect in Photoshop
Press Control-D to deselect.
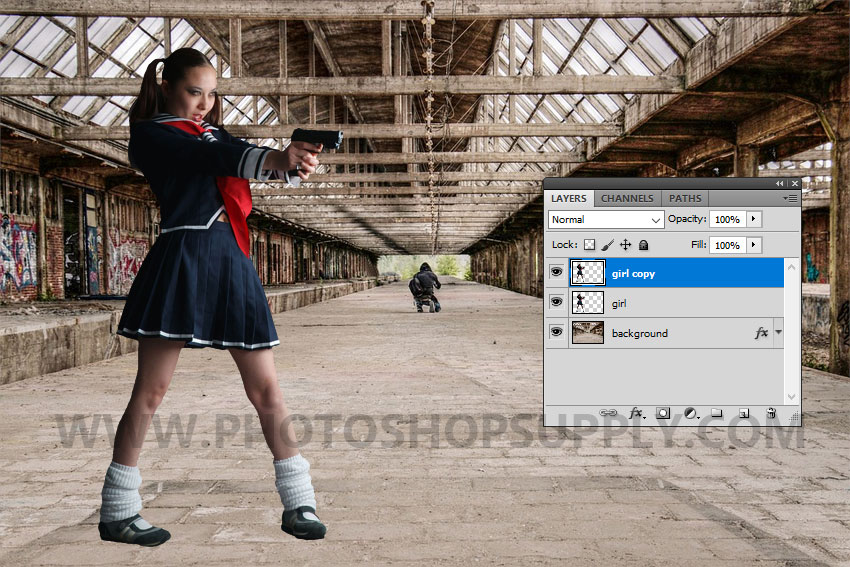
5. Duplicate Layer in Photoshop
Press Control-J to duplicate the Girl layer.
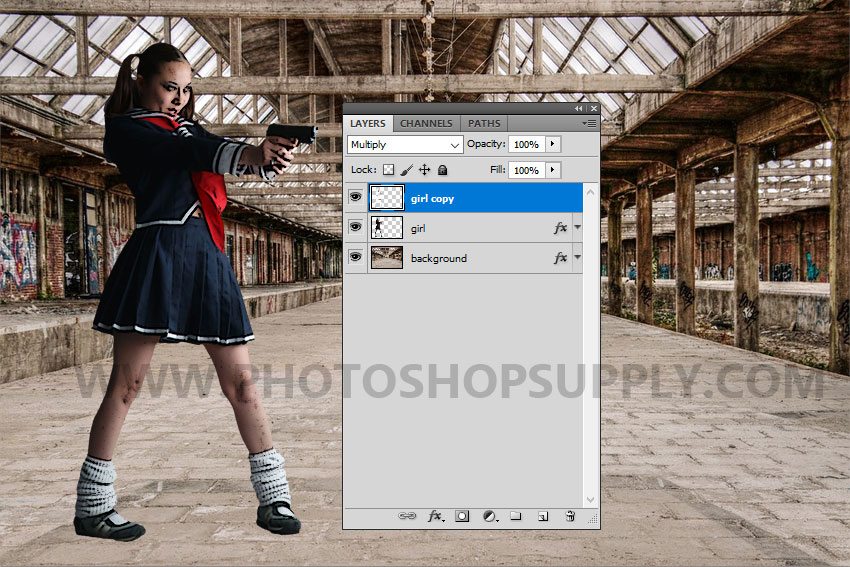
6. How to Use the Photocopy Filter in Photoshop
Set the Foreground color to #000000 and the Background color to #ffffff . Go to Filter > Sketch > Photocopy and make these settings.

Set the blend mode of the Girl copy layer to Multiply.
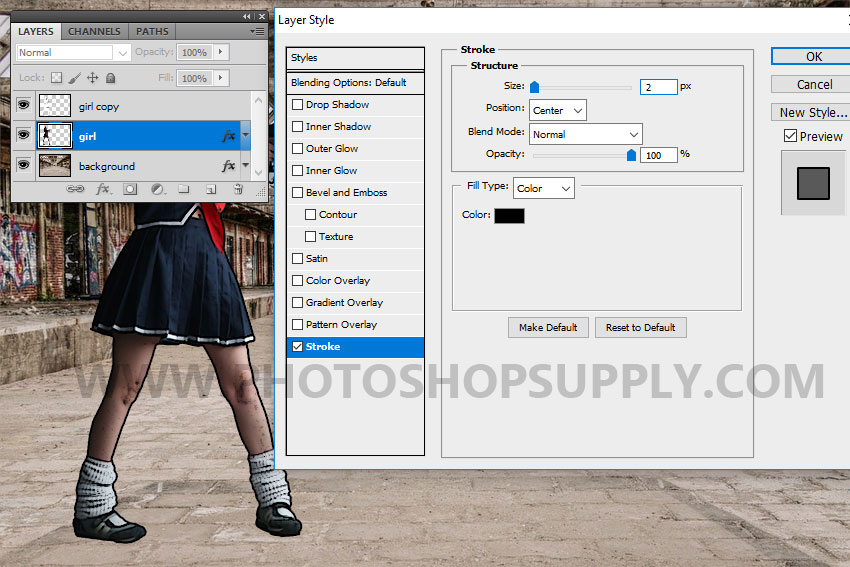
7. Add a Stroke Outline in Photoshop
Add a Stroke layer style to the Girl layer. Use color #000000 for the outline.
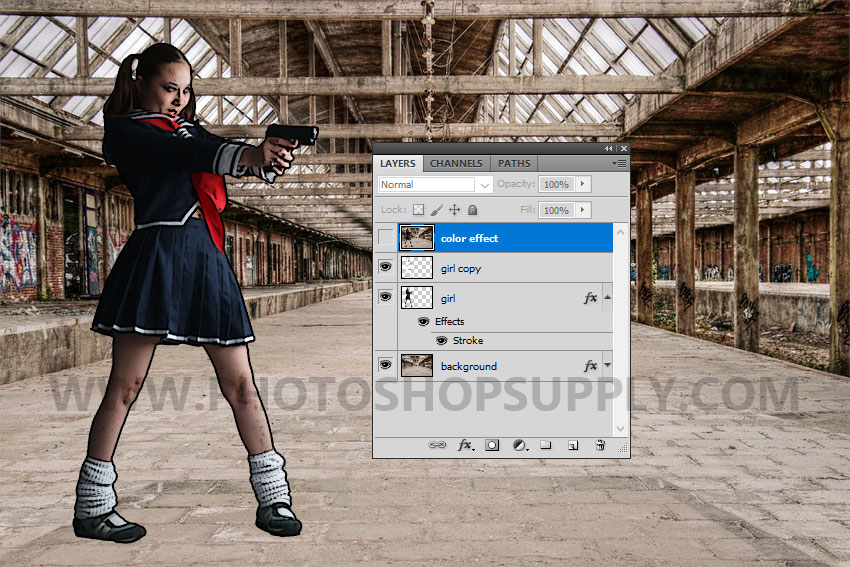
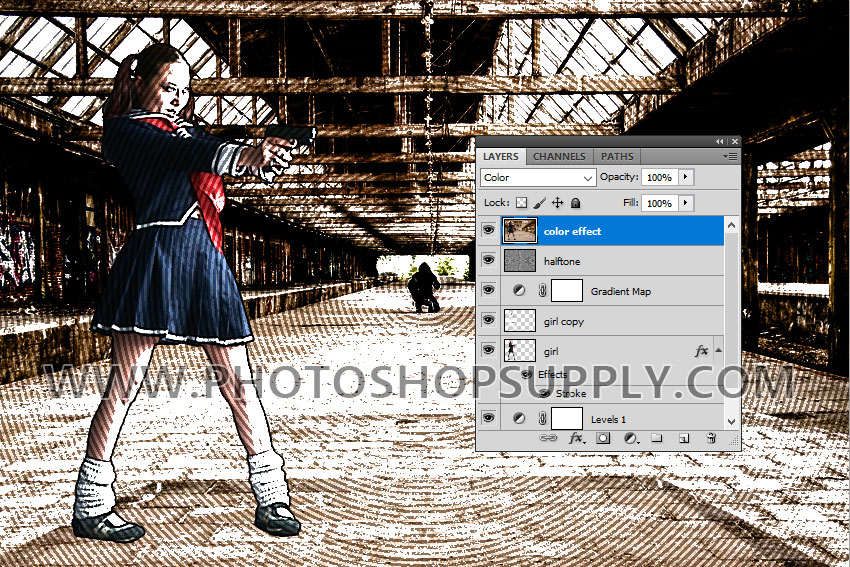
8. Use the Apply Image in Photoshop
Go to the Girl copy layer.
Let’s use the Apply Image option to make a copy of all the visible layers merged. Press Shift-Control-Alt-E. That is the shortcut for the Apply Image.
Call the new created layer Color Effect. Hide this layer for the moment.
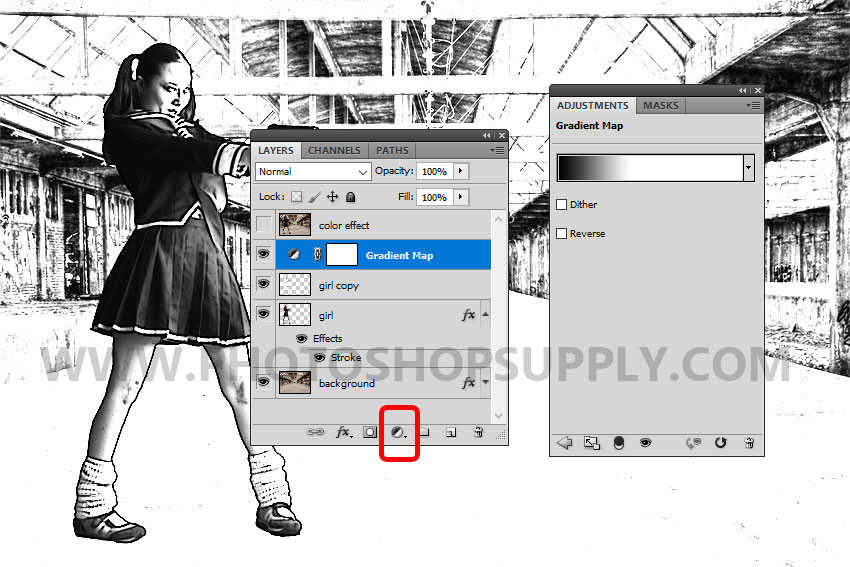
9. Create a Black and White Image in Photoshop
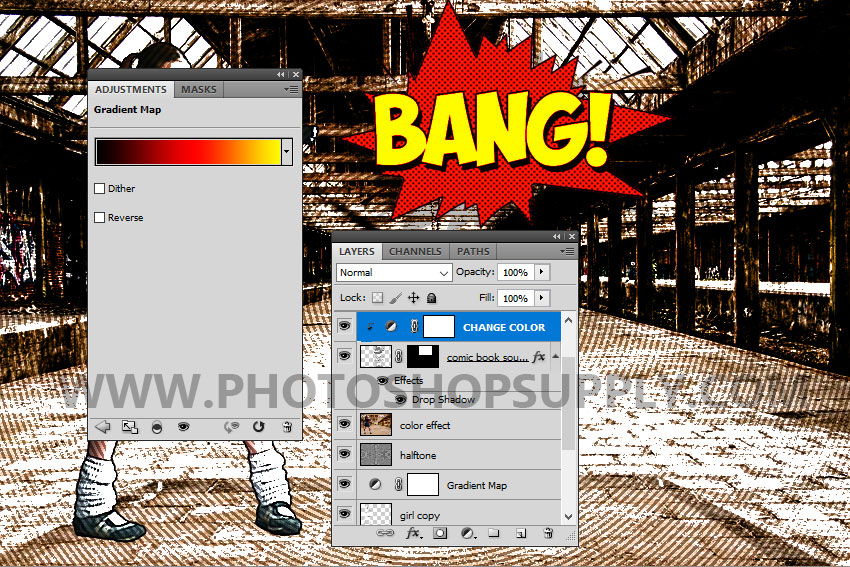
Go to the Girl copy layer. To turn the image int o a black and white comics book we use a Gradient Map adjustment layer.
The colors for the gradient are #000000 (location 0%) and #ffffff (location 39%). You might have to change the location of the black and white colors if you are using other images.
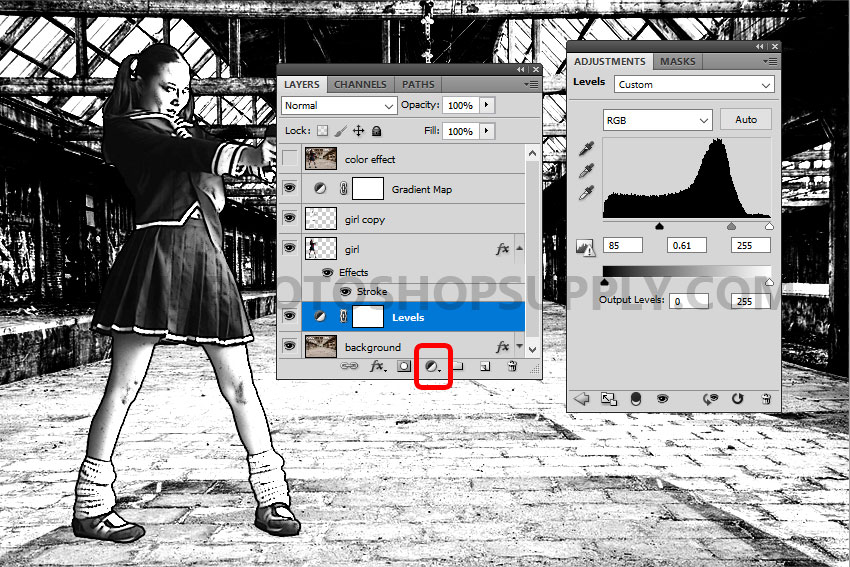
10. Add a Levels Adjustment in Photoshop
Go to the Background layer. Add a Levels adjustment to change the contrast of the background image making it more visible.
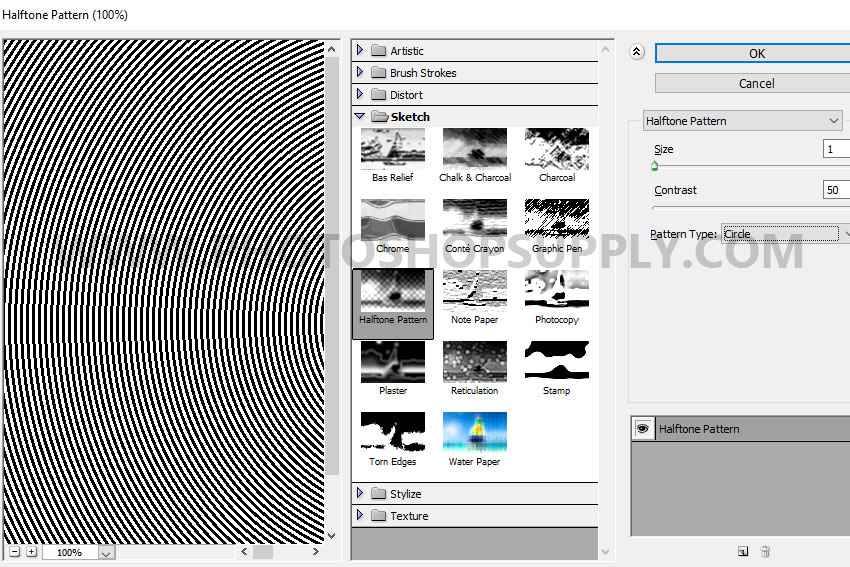
11. Use the Halftone Filter in Photoshop
Go to the Gradient Map layer. Press Shift-Control-N to create a new layer called Halftone.
Press X to invert the Foreground color and the Background color. Press Shift-F5 to fill the layer with color white.
Go to Filter > Sketch > Halftone Pattern and choose the Pattern Type Circle.
Set the blend mode of the Halftone layer to Color Burn, opacity 50%–65%.
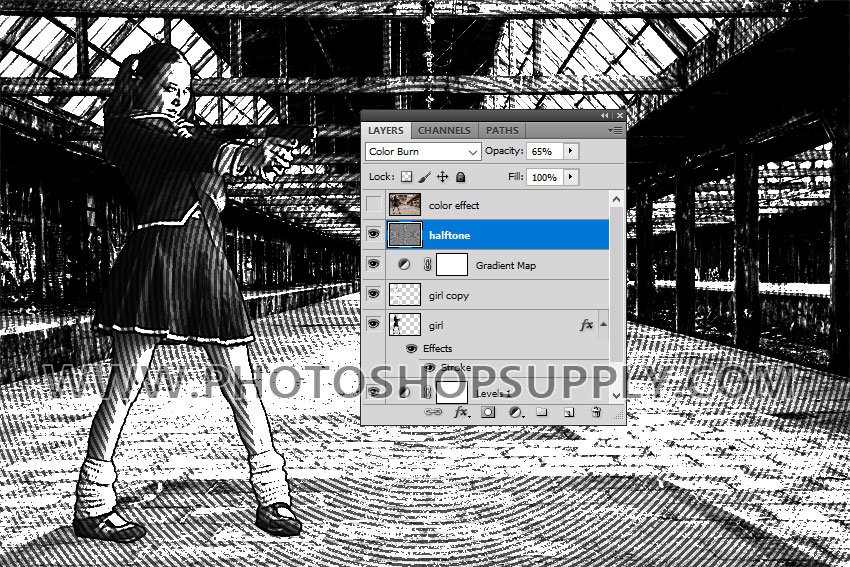
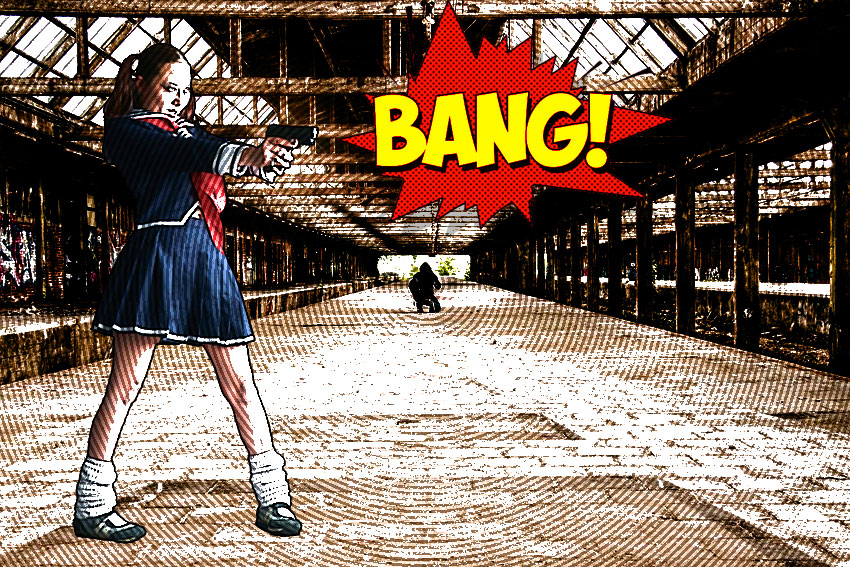
If you want to obtain a colored comic book image you have to make visible the Color Effect layer. Also change the blend mode to Color.
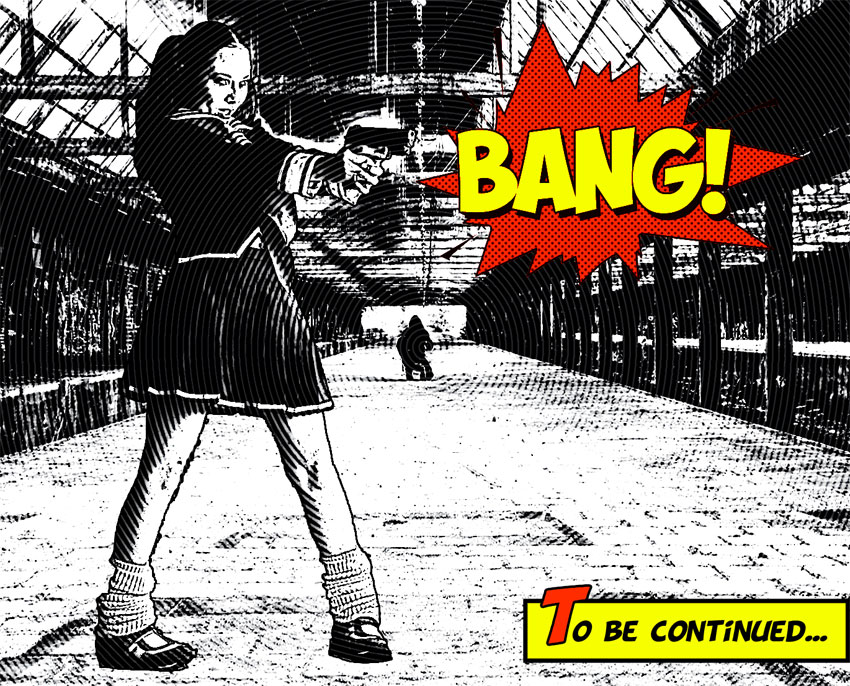
12. Add Comics Elements
To create a more realistic comics book art I will use these comics book elements ; the pack includes a PSD with colored comic book sounds and also Photoshop comics brushes.
Open the PSD file and keep the Shift key pressed and click on the Comic book sounds layer and Change Color adjustment layer to select both of them.
Right click and choose Duplicate layers. In the Destination document choose the Comics Book PSD file.
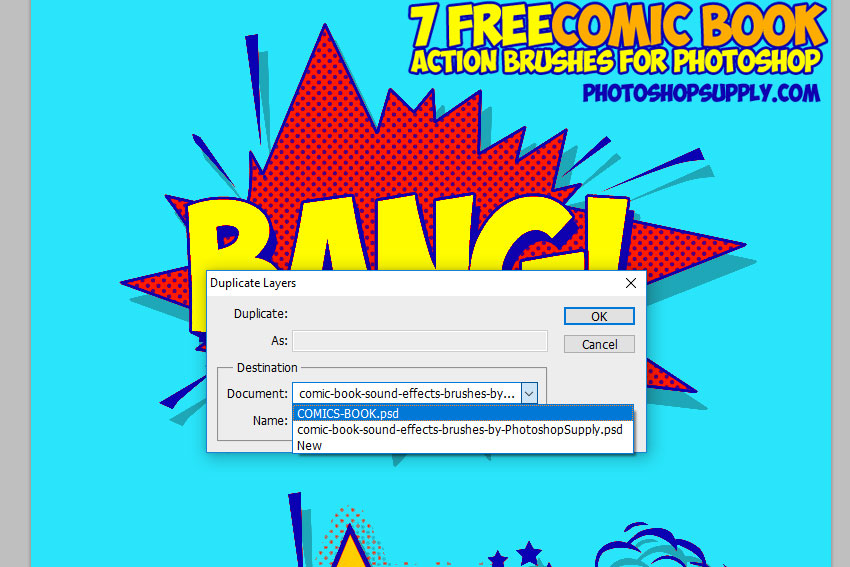
Make sure the two layers are place above the Color Effects layer.
To keep only one comic sound you can either delete the other ones using the Eraser Tool or you can use a Mask.
To change the color tones of the comic sound, double click on the Change Color adjustment layer and simply change the colors. I will replace the blue with black.
You can also check out my free set of cartoon sound effects that you can use to create comic book effects and cartoon effects.
To create a comic effect or a cartoon effect in Photoshop, check out my premium actions:
Congratulations, you made it!
So this is it! Now you know how to turn photo into comic book art using Photoshop.
Turn Any Photo Into A Comic Book Illustration (Video Tutorial)

I suggest you to download the comic strip template set and use it to create your own comic book pages.
Other resources that you might like:
- Arrow Shapes (FREE)
- Photoshop Light Brushes | FREE
- Explosion Photoshop Brushes | FREE
- Chalk (Chalkboard Texture & Chalk Effect | PREMIUM)


